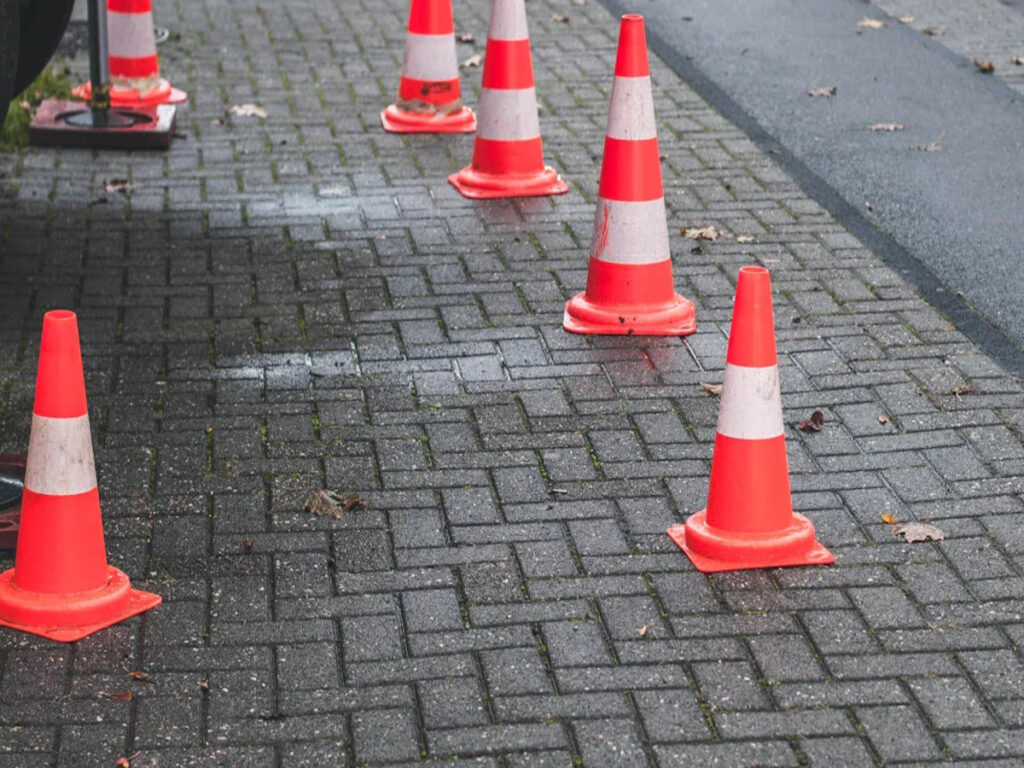
Proper traffic cone spacing plays a vital role in keeping drivers and workers safe in traffic control zones. Recommended distances depend on speed limits. For example, at 40 mph, the maximum cone spacing is 20 feet in tapers and 40 feet in tangents. At 45 mph, the spacing increases to 30 feet and 60 feet. Highways with speeds of 50 mph or more require even greater distances.
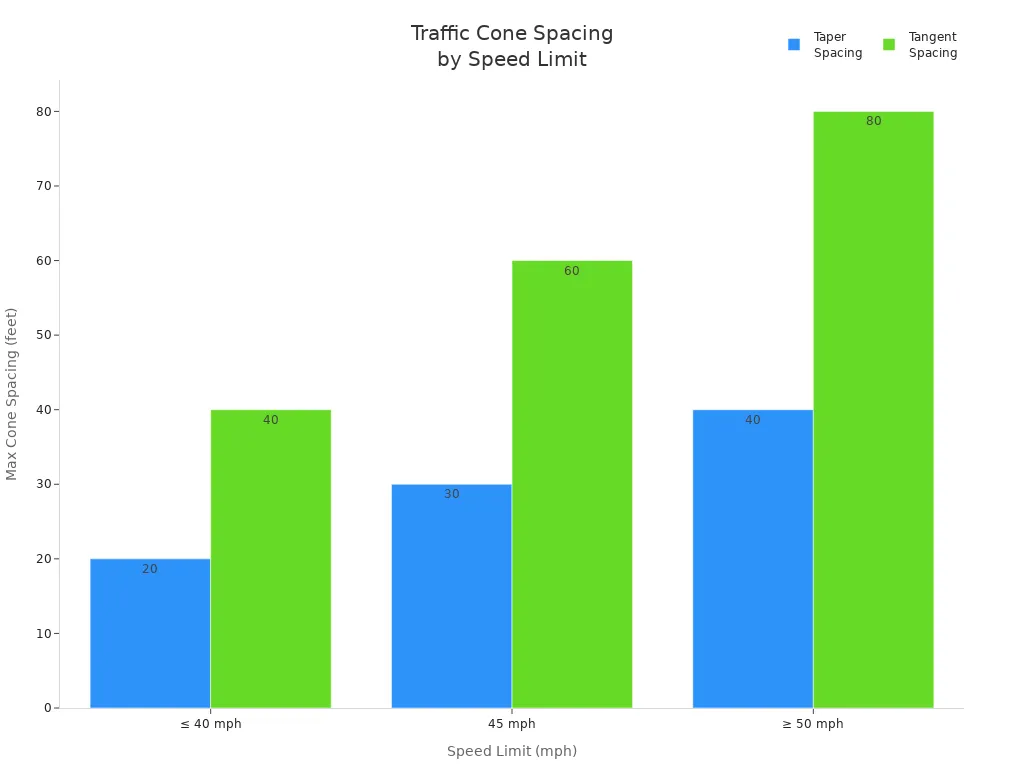
| Speed (mph) | Max Cone Spacing (Taper) in Feet | Max Cone Spacing (Tangent) in Feet |
|---|---|---|
| ≤ 40 | 20 | 40 |
| 45 | 30 | 60 |
| ≥ 50 | 40 | 80 |
Correct spacing of cones for traffic control helps prevent accidents and keeps vehicles moving smoothly.
At OPTRAFFIC, we offer high-quality traffic cones and other traffic control products designed to improve safety and efficiency on the road. Whether you’re managing a construction site or setting up a temporary detour, our cones and barricades provide the visibility and durability you need to keep traffic moving safely. Explore our range of traffic control solutions today!
Key Takeaways
- Correct traffic cone spacing is very important for safety. Use the right distances for each speed limit to stop accidents.
- Good cone placement gives drivers enough time to see and react. This helps them stay safe when the road changes ahead.
- Right spacing keeps traffic moving smoothly. It stops confusion and cuts down on delays in work zones.
- Always think about the road and weather when you put cones down. Change the spacing if you need better visibility or safety.
- Check and move cones often. This makes sure traffic control stays safe and works well for drivers and workers.
Safety Benefits of Proper Traffic Cone Spacing
Accident Prevention
Traffic cones help stop accidents in work zones. When workers put cones at the right distance, drivers see where to go. This helps them not make quick, unsafe moves. Studies show that using the right cone spacing means fewer crashes. The table below shows how cone spacing changes with speed:
| Speed Limit (mph) | Cone Spacing (feet) |
|---|---|
| 25 mph | 20–25 ft |
| 40 mph | 40 ft |
| 55 mph | 55 ft |
| 70 mph | 70 ft |
Putting cones so they face traffic makes them easier to see. Workers should leave at least 30 feet between each cone. This gives cars a clear path to follow. Extra cones can show where there are dangers or things in the way. This helps drivers go around them safely. This setup makes the road easy to follow and keeps everyone safer.
Tip: Always use enough traffic cones to show the work zone. This helps drivers know where to drive and keeps people safe.
Adequate Warning Time
Good cone spacing gives drivers time to notice changes ahead. When drivers see road safety cones early, they can slow down or switch lanes safely. This is very important when cars are going fast or there are lots of cars.
A good line of cones makes the path clear and easy to see. Drivers can spot cones from far away and change how they drive. This helps stop sudden stops or turns that can cause crashes. Using the right cone spacing means fewer accidents and safer work zones for all.
- Traffic cones show drivers where to go.
- They help stop accidents in work zones.
- Good spacing gives drivers time to react to dangers.
Efficiency Benefits in Traffic Control Zones
Smooth Traffic Flow
Traffic cones help cars move safely in work zones. Workers put cones at the right distance. Drivers know where to go. This setup stops confusion. It keeps traffic from slowing down a lot. Many road projects show good cone spacing helps. There are fewer traffic jams and less waiting.
- On highways, cones guide cars around roadwork. This setup stops traffic from getting stuck. It lowers the chance of accidents, even at night.
- During road fixes, workers space cones by the speed limit. This method helps drivers see changes early. It stops sudden lane changes.
- The Manual on Uniform Traffic Control Devices (MUTCD) says to use a 20:1 taper rate. This rule helps cars move smoothly through work areas.
Traffic cones make clear paths for drivers. When drivers see a line of cones, they follow it. They do not stop or make sharp turns. This process helps cars keep moving. It cuts down on delays. Using cones the right way helps emergency vehicles get through faster.
Note: Good cone placement can help cars move faster in work zones.
Compliance and Driver Response
Traffic cones do more than mark work areas. They help drivers follow rules in traffic zones. When workers space cones right, drivers know what to expect. This helps drivers stay calm and follow signs.
Following MUTCD rules for cones shows drivers a safe route. This setup helps drivers follow the rules. It lowers mistakes. For merging or transition tapers, workers put cones no more than the speed in feet apart. For example, in a 40 mph zone, cones should be 40 feet apart. In tangent or buffer areas, spacing can be doubled. Workers should put cones closer in curves or at night.
Traffic cones help drivers react to changes. When cones are spaced right, drivers slow down or change lanes safely. This process helps cars keep moving. It stops sudden stops and keeps everyone safe.
Traffic Cone Spacing Guidelines by Speed
Choosing the right spacing for traffic cones depends on the speed of the road. The faster vehicles move, the more space drivers need to see and react to cones for traffic control. Proper spacing helps drivers stay safe and keeps traffic moving smoothly. The following guidelines explain how to space cones for traffic control in different speed zones.
Low-Speed Roads (≤25 mph)
On roads with a speed limit of 25 mph or less, drivers move slowly and have more time to react. Workers use closer spacing for traffic cones in these areas. This setup creates a clear path and helps drivers understand where to go.
- Workers place traffic cones 10 to 15 feet apart.
- Closer spacing gives better guidance and reduces confusion.
- This method keeps traffic organized and lowers the risk of accidents.
- Smooth traffic flow is easier to maintain with this spacing.
A line of cones for traffic control at short intervals makes the work zone easy to see. Drivers can follow the path without making sudden moves. This approach works well in school zones, residential streets, and parking lots.
Tip: Closer spacing of cones for traffic control in low-speed areas helps drivers feel confident and safe.
Medium-Speed Roads (26–45 mph)
Medium-speed roads need a balance between visibility and guidance. Vehicles move faster, so drivers need more time to see and react to traffic cones. The Manual on Uniform Traffic Control Devices (MUTCD) gives clear rules for these roads.
- For roads with speeds from 26 to 45 mph, workers use a spacing equal to half the speed limit in feet.
- For example, at 40 mph, cones for traffic control should be 20 feet apart.
- This spacing helps drivers see the work zone early and adjust their speed.
A table below shows common spacing for medium-speed roads:
| Speed Limit (mph) | Cone Spacing (feet) |
|---|---|
| 30 | 15 |
| 35 | 17.5 |
| 40 | 20 |
| 45 | 22.5 |
Workers use cones for traffic control to guide vehicles through lane changes and around obstacles. Proper spacing keeps the flow steady and prevents sudden stops. This method also helps with controlled vehicle speed, making the area safer for everyone.
Note: Following MUTCD guidelines for cone spacing on medium-speed roads improves safety and driver response.
High-Speed Roads (46+ mph)
High-speed roads require even greater spacing between traffic cones. Vehicles travel quickly, so drivers need more distance to see cones for traffic control and react safely. National and state agencies set clear rules for these roads.
- On roads with speeds above 46 mph, workers space traffic cones farther apart.
- At 50 mph, cones for traffic control should be 40 to 50 feet apart.
- On highways with a 70 mph limit, cones are spaced 70 feet apart.
- In areas with heavy traffic, workers may use closer spacing to improve visibility.
The Federal Highway Administration recommends a minimum spacing of 20 feet and a maximum of 300 feet on curves. Proper spacing on high-speed roads helps drivers see changes ahead and adjust their controlled vehicle speed. Studies show that correct spacing reduces accidents by making drivers more aware of work zones.
| Speed Limit (mph) | Cone Spacing (feet) |
|---|---|
| 50 | 40–50 |
| 55 | 55 |
| 70 | 70 |
Workers use cones for traffic control to mark lane closures, guide merging traffic, and protect work crews. Greater spacing gives drivers enough time to react, especially when traveling at high speeds. This practice keeps both drivers and workers safe.
Remember: High-speed roads need more space between traffic cones to give drivers enough warning and keep traffic flowing.
Why Spacing Changes with Speed
As vehicle speed increases, drivers need more time and distance to see and respond to cones for traffic control. On low-speed roads, close spacing keeps the path clear. On high-speed roads, greater spacing improves visibility and gives drivers enough time to react. This approach supports safe and efficient movement in all types of work zones.
Factors Affecting Cone Spacing in Traffic Control Zones
Road and Weather Conditions
Road and weather can change how workers set up cones. Rain, fog, or snow make it hard for drivers to see cones. Workers use cones with bright colors and reflective tape to help drivers see better. Taller cones help drivers notice dangers like floods or ice from far away. In fast areas, these cones give drivers more time to slow down or switch lanes. Putting cones in the right spots helps cars move safely around roadwork. This keeps drivers and workers safe. Workers can change cone spacing quickly when the weather changes. This helps keep roads and sidewalks safe in temporary operational zones.
- Bright cones with reflective tape help drivers see in bad weather.
- Taller cones are best for fast roads or poor weather.
- Good placement helps cars avoid dangers.
Visibility and Lighting
Bad lighting and low visibility make work zones more risky. Workers put reflective bands on cones so drivers can see them at night or in fog. Sometimes, they add lights or glowing signs to help drivers spot cones. Cones placed about 40 steps from the work area give clear directions. Workers can change cone spacing fast if lighting gets worse. Good visibility helps keep roads and sidewalks safe, especially near roadwork at night.
- Reflective bands and extra lights help drivers see cones.
- Clear cone placement keeps work zones safe.
Traffic Volume
Lots of cars change how workers space cones in work zones. More cars mean more danger for drivers and people walking. Workers put cones closer together in busy places to keep traffic moving and protect people. The kind of road matters too. Curves, night work, or bad weather need cones even closer together.
| Section Type | Spacing Recommendation |
|---|---|
| Taper Section | Spacing should not be more than the speed limit in feet (like 40 feet in a 40 mph zone). |
| Tangent Section | Spacing can be up to twice the speed limit (like 80 feet in a 40 mph zone). |
| General Advice | Closer spacing (20–25 feet) is best in curves, at night, or in bad weather. |
Good planning in work zones helps traffic move and lowers risks during roadwork.
Best Practices for Using Traffic Cones
Placement Techniques
Traffic control teams use good steps to keep work zones safe. They follow a plan when putting out traffic cones. First, they put up warning signs and cones to mark the work area. This tells drivers and people walking to slow down and watch out. Next, they make a buffer area with cones or barriers. This space keeps workers away from moving cars. It helps stop accidents from happening. Teams also set up an advanced warning area. Here, signs and cones warn drivers before they get to the work zone. This gives drivers time to get ready and stay safe.
| Area Type | Description |
|---|---|
| Work Area | Has warning signs, cones, and safety gear to warn drivers and people walking. |
| Buffer Area | A space with cones or barriers that keeps workers safe from cars. |
| Advanced Warning Area | Has signs and things drivers can see to warn them about work ahead. Drivers have time to change lanes or slow down. |
Workers check the cones often to make sure they are straight and spaced right for the speed zone. They use reflective tape or lights if it is dark or hard to see. Teams move cones if the weather or traffic changes. These steps help drivers see where to go and keep everyone safe.
Tip: Teams should always look at the work zone after putting out cones to make sure everything is done right.
Tools and Resources
Many teams use special tools to help them put cones in the right places. These tools help plan and check the setup. Some popular tools are:
- CONE Software lets teams make pictures of traffic control plans. It helps with planning and shows what is needed for the job.
- Traffic Control Plans Software helps teams see where to put cones and how many to use. It figures out the best spacing for different roads.
With these tools, teams can follow good steps every time. They save time and help keep drivers and workers safe.
Common Mistakes with Cones for Traffic Control
Over-Spacing and Under-Spacing
Many teams make mistakes when putting out traffic cones. One mistake is over-spacing. This means cones are too far apart. Drivers might not see the work zone well. Big gaps can let cars go where workers are. This puts both workers and drivers in danger. Under-spacing is another problem. If cones are too close, the path looks confusing. Drivers may not know where to drive. This can slow down cars and cause crashes.
Some other mistakes are:
- Putting cones in the wrong places does not help drivers.
- Using cones without reflective tape makes them hard to see at night or in bad weather.
- Dirty or broken cones make it hard for drivers to understand.
- Too many cones can make the road look messy and unclear.
Tip: Teams should check cone spacing often and change it for the road and speed.
A good setup helps drivers see the work zone and move safely.
Ignoring Site-Specific Needs
Every work zone is different. Teams need to look at the road, traffic, and weather before placing cones. Not doing this can confuse drivers. For example, sharp curves or busy intersections need special cone setups. If teams do not adjust, drivers may not get clear directions. This can cause crashes or slow traffic.
- Good placement helps guide drivers safely.
- Smart cone spots give clear directions and keep people safe.
- Not thinking about the site can make things dangerous and confusing.
Teams should always plan for what makes each place different. They should use cones to fit the road’s shape, lighting, and how busy it is. This keeps both drivers and workers safe.
Quick Reference Chart for Traffic Cone Spacing
A quick reference chart helps workers know where to put cones. The chart shows how far apart cones should be for each speed limit. Workers use it to keep construction sites safe and neat. It also helps drivers see the work zone early and get ready.
Tip: Always look at the speed limit and road before putting out cones. Change the spacing if it is hard to see or there are lots of cars. This keeps everyone in the work zone safe.
| Speed Limit (mph) | Cone Spacing in Taper (feet) | Cone Spacing in Tangent (feet) | Typical Use Case |
|---|---|---|---|
| ≤ 25 | 10–15 | 20–30 | School zones, city construction |
| 30–40 | 20 | 40 | Urban construction, lane shifts |
| 45 | 30 | 60 | Road repairs, bridge work |
| 50–55 | 40–50 | 80–100 | Highway construction |
| 70 | 70 | 140 | Interstate construction |
Construction teams use the chart to make work zones safe. They put cones closer together on sharp turns or when it is dark. This gives drivers more time to see and slow down. At night, workers add more cones and use reflective tape so drivers can see better.
A good warning system uses both cones and signs. Teams put up warning signs before the work area. This tells drivers to slow down and watch for changes. Workers also use cones to make buffer zones. These zones help protect workers from cars.
- Always use the chart for every job.
- Put out cones and signs early so drivers have time to react.
- Check the work zone often and move cones if needed.
A quick reference chart helps teams save time and do a good job. It makes sure every warning is easy to see and every work zone is safe.
Good traffic cone spacing helps keep people safe and cars moving. Teams make safe zones by warning drivers early and guiding them around dangers. They also protect workers from cars. Changing cone spacing for speed, weather, or road type helps drivers see warnings sooner. Using taller cones and reflective tape helps drivers see at night. Professionals should:
- Put cones the same distance apart in work zones.
- Look at the warning area from a driver’s seat.
- Move cones if needed to keep the zone safe.
Training and checking cones often keeps warning areas safe in all work zones.
| Taper Type | Length | Cone Spacing |
|---|---|---|
| One-lane, two-way taper | 100 ft | 20 ft (5 channelizers) |
FAQ
How far apart should I place traffic cones?
The ideal distance between traffic cones depends on the type of road and the speed of traffic. For most high-speed roads, cones should be placed 50 to 150 feet apart to ensure drivers can clearly see upcoming changes in the road and adjust their speed accordingly. On curves or when visibility is reduced, cones may need to be placed closer together to alert drivers of the change in conditions.
What are the rules about placing traffic cones?
When placing traffic cones, it’s essential to follow the Federal Highway Administration (FHWA) guidelines for traffic control. Cones should be used to clearly mark detours, construction zones, or hazard areas. Placement should ensure that drivers are able to see and react in time. The spacing can vary based on the road type, speed limits, and the complexity of the road layout. Cones should also be positioned so that they are easily visible to drivers, with retroreflective or brightly colored cones being used in low visibility conditions such as at night or in bad weather.
What is the best way to space traffic cones in construction sites?
Workers should space traffic cones based on the speed limit. On slower roads, cones are closer together. On faster roads, cones are farther apart. This method helps drivers see the work area and move safely through construction sites.
Why does cone spacing change with speed?
Drivers need more time to react at higher speeds. Wider spacing gives drivers enough warning to slow down or change lanes. Proper spacing helps prevent common hazards in work zone areas, such as sudden stops or lane changes.
What are tips for driving in traffic control zones?
Drivers should slow down, watch for cones, and follow signs. Staying alert helps avoid accidents. Workers may change cone placement if weather or traffic changes. Drivers should always expect changes and stay focused in these areas.
How do cones help with safety at night?
Reflective tape and lights on cones make them easier to see in low light. Workers may use more cones or place them closer together at night. This setup helps drivers spot the work zone early and drive safely.
Where can I buy traffic cones for traffic control?
If you’re looking for high-quality traffic cones and other traffic safety products, OPTRAFFIC is your go-to supplier. We specialize in providing traffic management companies with durable, compliant, and effective traffic control solutions. Whether you need cones for construction zones, speed zones, or road safety, our products are designed to meet the highest standards and ensure maximum safety on the road. Visit OPTRAFFIC to explore our full range of products tailored for professional traffic management needs.

