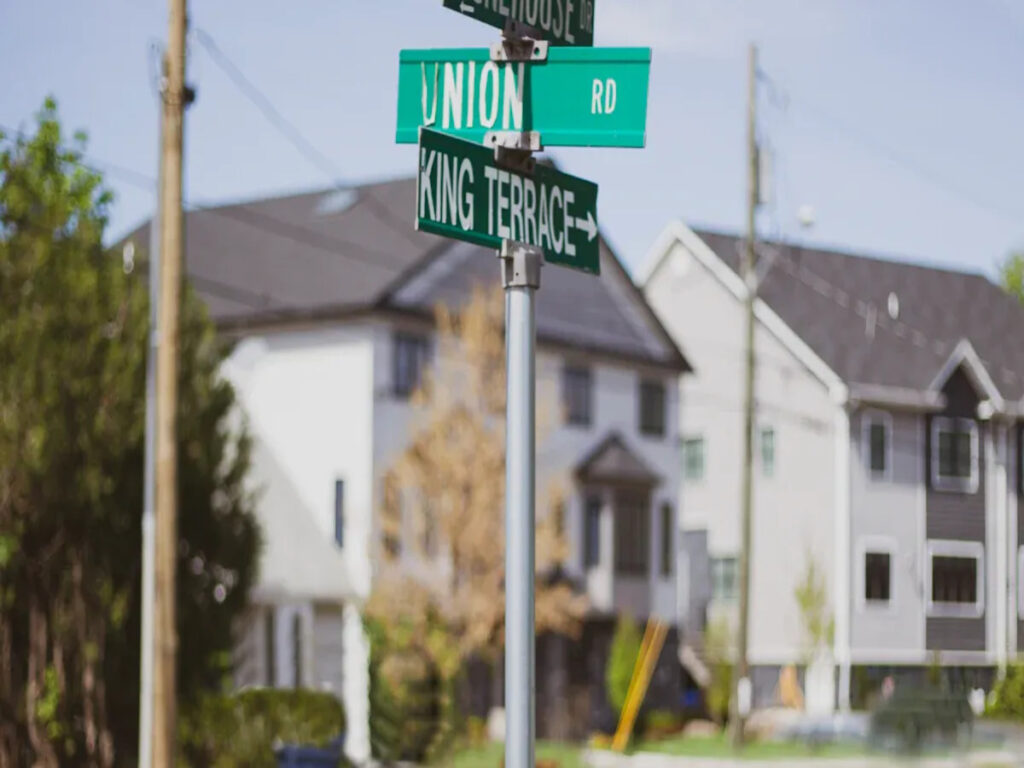
Have you ever thought about how street signs stay up? They guide us through busy streets and calm neighborhoods. Street sign mounting brackets are very important for keeping signs secure. These brackets are not just tools—they help keep people safe. They also make it easier to find your way around. Picking the right street sign mounting brackets is key for strength and visibility. That’s why choosing the right one matters so much. The right bracket can really make a big difference!
OPTRAFFIC designs high-quality street sign mounting brackets that deliver both reliability and performance. Whether you need top-mount, side-mount, or multi-directional options, OPTRAFFIC traffic sign brackets are built to withstand tough weather and daily wear—keeping road signs clear, secure, and compliant for years to come.
Key Takeaways
- Pick the right bracket based on the sign type. Use top brackets for thick blades and side brackets for flat ones.
- Match the bracket to the pole type. Round, square, and U-channel poles need specific brackets to stay secure.
- Check the weather in your area. Aluminum brackets don’t rust in wet places, while steel brackets are strong for windy spots.
- Think about how easy it is to install. Side brackets are faster to set up, but top brackets are easier to see and may need special tools.
- Follow local rules before putting up signs. This keeps things safe and avoids fines or problems.
Understanding Street Sign Mounting Brackets
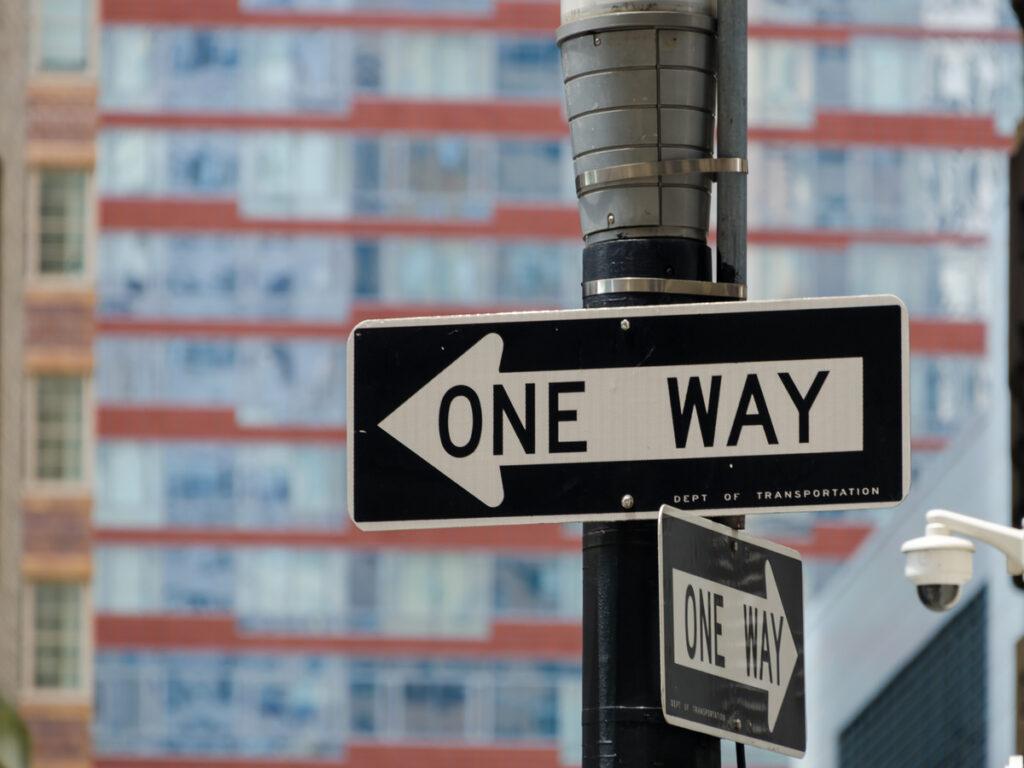
Street sign mounting brackets may not cross your mind often. However, they are key to keeping signs steady and clear. These street sign mounting brackets attach signs to poles, holding them firmly in place. No matter the weather, they ensure signs stay put. Without brackets, signs couldn’t guide traffic or give directions well.
What Are Street Sign Mounting Brackets
Street sign brackets are tools that secure signs to poles. They come in many shapes and sizes for different signs and poles. Whether it’s a stop sign or a street name sign, brackets keep them where they belong. Built for outdoor use, they are strong and long-lasting.
Blade Compatibility: Flat vs. Extruded
Not all street signs are alike, and their blades differ too. Some signs have flat blades, while others have thicker, stronger extruded blades. The blade type decides which bracket works best. Flat blades often fit side mount brackets. Extruded blades usually need top mount brackets. Knowing the blade type helps you choose the right bracket.
Want to learn more about how blade types affect bracket choice? Read our blog: Flat vs. Extruded Street Name Signs: Which One Needs a Stronger Bracket? for a complete comparison and practical recommendations.
Pole Compatibility: Round, Square, or U-Channel
Brackets also need to match the pole type. Poles can be round, square, or U-channel shaped. Each pole shape needs a specific bracket for a tight fit. For example, U-channel poles need brackets that grip their unique shape. Picking the right pair keeps signs steady and easy to see.
Material Choices: Aluminum vs. Steel
The material of street sign mounting brackets is very important. The two main choices are aluminum and steel, each with its own benefits. Picking the right one depends on your location, needs, and budget.
Why Choose Aluminum?
Aluminum is light but still strong. It’s great for places where signs need to be moved or updated often. It doesn’t rust because it resists corrosion naturally. This makes it perfect for wet or coastal areas. It also looks modern and neat, giving signs a clean appearance.
Tip: Use aluminum street sign mounting brackets in humid areas to avoid rust problems.
Why Choose Steel?
Steel is known for being tough and long-lasting. It’s heavier than aluminum, making it better for windy or busy areas. Steel brackets can handle more damage over time. Some have coatings to stop rust and keep them looking good.
Note: In places with harsh weather, steel brackets are a sturdy choice.
Comparing Aluminum and Steel
Here’s a simple chart to help you decide:
| Feature | Aluminum | Steel |
|---|---|---|
| Weight | Light | Heavy |
| Rust Resistance | Excellent | Okay (with coating) |
| Strength | Good | Excellent |
| Look | Modern and clean | Strong and rugged |
| Price | Medium | Medium to High |
Both materials work well, but your choice depends on your needs. Think about the weather, pole type, and how long the brackets should last.
Need help deciding? Check out our blog: Street Sign Bracket Materials Compared: Aluminum vs. Steel vs. Plastic for a full breakdown of durability, cost, and ideal applications.
Top Mount Street Sign Brackets
Installation and Primary Uses
Top mount street sign brackets go on the very top of poles. They are often used for signs that need to be seen from all directions. These street sign mounting brackets work best with extruded sign blades, which are thicker and stronger. To install, slide the blade into the bracket and tighten it with bolts. It’s simple, but you must make sure the pole’s top is clear and easy to reach.
These traffic sign brackets are great when visibility is very important. They lift the sign higher, making it easier for people to see from far away. Whether it’s a stop sign or a street name sign, top mount brackets keep them steady and noticeable.
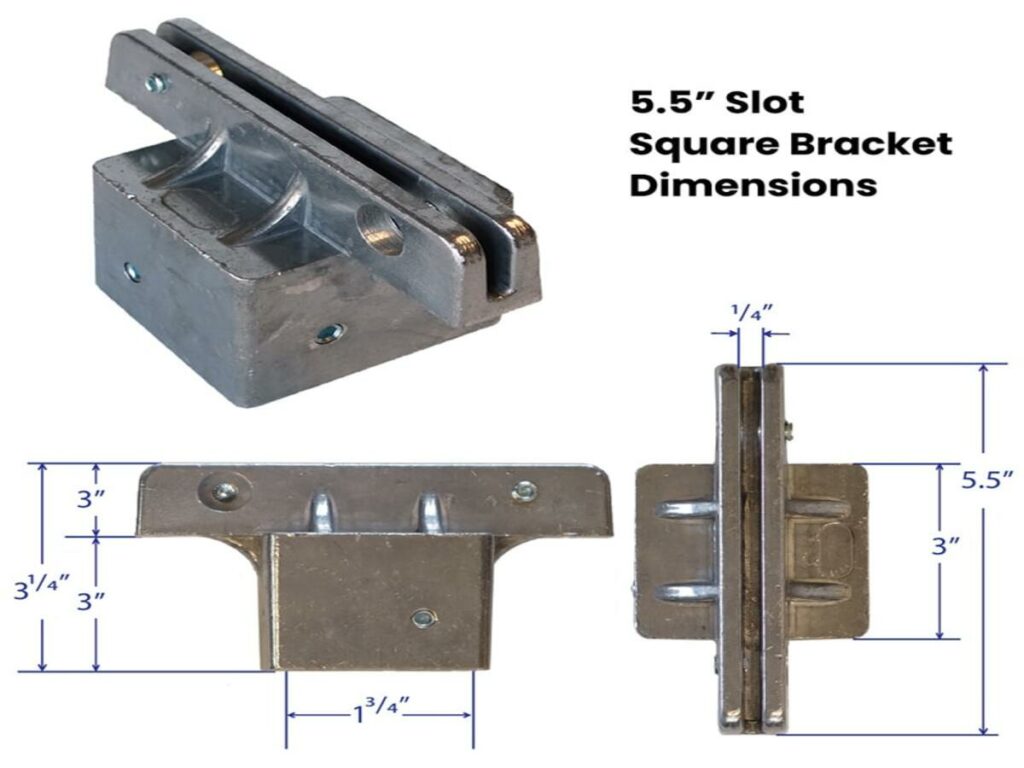
Looking for a durable and easy-to-install top mount bracket? Check out OPTRAFFIC Extruded Street Name Bracket — built for strength, visibility, and long-term performance in any environment.
Ideal Applications: Intersections and Dual-Direction Signs
Top mount brackets are perfect for intersections or places where signs need to face two ways. They let you attach two signs back-to-back, so both sides of the road can see them. This makes them great for busy streets where clear directions are needed.
You can also use these brackets in open areas like highways or big parking lots. Their height keeps the sign from being blocked by trees, buildings, or other things. If you want the sign to be seen clearly, top mount brackets are a smart choice.
Strengths of Top Mount Brackets
Top mount brackets have many benefits. First, they handle strong winds well. Their design keeps the sign steady, even in bad weather. Second, they look neat and professional. The sign sits nicely on top of the pole, giving it a clean and modern style.
Another benefit is their ability to hold dual-direction signs. This makes them useful in many different places. Plus, their height improves visibility, helping the sign do its job better.
Pro Tip: Use top mount brackets in windy areas or where two-way signs are needed.
Weaknesses of Top Mount Brackets
While top mount brackets have many advantages, they’re not perfect for every situation. One of the main challenges is installation. Since these brackets sit at the very top of the pole, you’ll need to ensure the pole’s height is accessible. This can be tricky if the pole is tall or located in a hard-to-reach area. You might need special tools or even a ladder to get the job done.
Another thing to consider is pole clearance. Top mount brackets require the pole’s top to be free of obstructions. If there’s already something like a light fixture or another sign at the top, you may need to rethink your choice. This can limit where you can use these brackets.
Top mount brackets also work best with extruded sign blades. If you’re using flat blades, you’ll need to look for a different option. This makes them less versatile compared to side mount brackets, which can handle both blade types more easily.
Lastly, while these brackets are great for visibility, they might not be the most cost-effective choice for every project. Their sleek design and dual-direction capability can make them slightly pricier than other options. If you’re working with a tight budget, this is something to keep in mind.
Tip: Before choosing top mount brackets, check the pole’s height and clearance to avoid installation headaches.
Side Mount Street Sign Brackets
Installation and Primary Uses
Side mount street sign brackets attach to the side of poles, making them easy to install. You don’t need to worry about reaching the top of the pole. Instead, you simply align the bracket with the pole and tighten it using bolts. This straightforward process saves time and effort, especially if you’re working on multiple signs.
These brackets work well with flat sign blades, but some extruded blades can fit too. They’re perfect for situations where you need a quick setup or when the pole’s top isn’t accessible. Whether you’re installing a stop sign or a directional sign, side mount brackets offer a practical solution.
OPTRAFFIC offers single-sided and double-sided side mount brackets, built to suit different visibility needs. Whether you’re placing one sign or two at a corner, our brackets ensure fast installation and long-lasting performance. Explore our full traffic sign bracket range to find the right fit for your project.
Best Use Cases: Tight Spaces and Single-Direction Signs
Side mount brackets shine in areas where space is limited. If poles are close to buildings, trees, or other obstacles, these brackets fit snugly without taking up extra room. They’re also ideal for single-direction signs, like those pointing toward a parking lot or exit.
You’ll find these brackets useful in urban settings, where poles often share space with other fixtures. They’re also great for suburban neighborhoods with narrow streets. Their low-profile design keeps signs visible without cluttering the area.
Pro Tip: Choose side mount brackets for tight spaces or when you only need one sign direction.
Strengths of Side Mount Brackets
Side mount brackets offer several advantages. First, they’re incredibly simple to install. You don’t need special tools or extra clearance at the top of the pole. This makes them a cost-effective choice for projects with limited budgets.
Second, their compact design works well in crowded areas. They keep signs secure without sticking out too much. This makes them practical for places where space is a concern.
Lastly, these brackets are versatile. They can handle flat blades easily and even some extruded ones. This flexibility means you can use them for various types of signs.
Note: Side mount brackets are a smart choice for quick installs and tight spaces.
Weaknesses of Side Mount Brackets
While side mount brackets are practical and easy to use, they do have a few limitations you should consider. One of the main drawbacks is their wind resistance. Since these brackets attach to the side of the pole, they don’t provide the same level of stability as top mount brackets. In areas with strong winds, signs mounted with side brackets might shift or vibrate more, which could affect their visibility.
Another thing to think about is their appearance. Side mount brackets don’t offer the same sleek, polished look as top mount options. If you’re aiming for a clean and modern design, these brackets might not meet your expectations. They tend to look more functional than stylish, which might not suit every setting.
You’ll also find that side mount brackets work best with flat sign blades. While some extruded blades can fit, the compatibility isn’t as seamless as with top mount brackets. If you’re using a mix of blade types, this could limit your flexibility.
Lastly, side mount brackets are better suited for single-direction signs. If you need to display signs in multiple directions, you might find these brackets less effective. They’re great for straightforward setups, but they don’t offer the versatility of dual-direction mounting.
Tip: If you’re in a windy area or need a polished look, consider whether side mount brackets are the right fit for your project.
Top vs. Side Mount Brackets: A Detailed Comparison
Mounting Position and Blade Compatibility
Top mount brackets go on the pole’s very top. This makes signs higher and easier to see from far away. Side mount brackets attach to the pole’s side. They are simpler to install, especially if the top is hard to reach.
Blade type is another important difference. Top mount brackets work best with extruded blades. These blades are thicker and stronger, matching the high position of top mounts. Side mount brackets are more flexible. They fit flat blades well and can also hold some extruded ones.
If your sign has flat blades, side mount brackets are a better choice. For extruded blades, top mounts give better support and visibility. Knowing your blade type helps you pick the right bracket.
Tip: Always check your blade type before picking a bracket. This saves time and ensures a good fit.
Best Use Cases and Visibility
Top mount brackets are great for open spaces like highways or intersections. Their height makes signs easy to see from far away. They also work well for dual-direction signs, showing messages on both sides of the pole.
Side mount brackets are best for tight spots. If poles are near trees, buildings, or other objects, these brackets fit without taking extra space. They’re perfect for single-direction signs, like those pointing to exits or parking lots.
Visibility depends on where the sign is placed. Top mount brackets lift signs higher, making them ideal for busy streets. Side mount brackets keep signs at eye level, which works well in slower traffic areas like neighborhoods.
Pro Tip: Use top mounts for busy roads and side mounts for small spaces.
Wind Resistance and Durability
Top mount brackets are better in strong winds. Their design keeps signs steady, even during storms. Side mount brackets are sturdy but less wind-resistant. Signs on the side may shake or move more in windy weather.
Durability depends on the bracket material. Aluminum doesn’t rust and is great for wet or coastal areas. Steel is tougher and lasts longer, making it better for windy or busy places.
For windy areas, top mount brackets made of steel are the strongest choice. In calmer places, side mount brackets made of aluminum are a cheaper and smart option.
Note: Think about your area’s weather when choosing street sign mounting brackets.
Ease of Installation and Cost Efficiency
When it comes to choosing between top and side mount brackets, ease of installation and cost efficiency are two factors you can’t ignore. These aspects can make a big difference, especially if you’re working on a large project or managing a tight budget.
Installation: Which One’s Simpler?
If you’re looking for a quick and straightforward setup, side mount brackets are the clear winner. You don’t need to climb ladders or deal with the top of the pole. Instead, you just attach the bracket to the side, tighten a few bolts, and you’re done. This makes them perfect for situations where time is limited or when you’re installing multiple signs in one go.
Top mount brackets, on the other hand, require a bit more effort. Since they sit at the very top of the pole, you’ll need to ensure the pole is clear and accessible. This might mean using a ladder or specialized tools, which can slow things down. However, the extra effort pays off in terms of visibility and stability, especially for dual-direction signs.
Tip: If you’re working solo or in a hurry, side mount brackets save you time and effort.
Cost Efficiency: Getting the Most for Your Money
Budget is always a concern, and side mount brackets tend to be the more cost-effective option. Their simpler design and easier installation mean you’ll spend less on both materials and labor. They’re a great choice for smaller projects or areas where you don’t need high wind resistance or dual-direction signs.
Top mount brackets, while slightly more expensive, offer better durability and versatility. They’re an investment that pays off in the long run, especially in areas with harsh weather or high traffic. If you’re installing signs in a busy intersection or along a windy highway, the added cost is worth it for the extra stability and visibility.
Balancing Ease and Cost
So, how do you decide? It all comes down to your specific needs. If you’re working in a calm neighborhood or a low-traffic area, side mount brackets are a practical and affordable choice. But if you’re dealing with challenging conditions or need a polished, professional look, top mount brackets are worth the extra effort and cost.
Pro Tip: Always consider the long-term benefits. Spending a little more upfront on top mount brackets can save you from costly repairs or replacements later.
Choosing the Right Street Sign Mounting Bracket
When it comes to picking the right street sign mounting bracket, you’ve got to think about where and how it’ll be used. Different environments and conditions call for different solutions. Let’s break it down so you can make the best choice.
Urban vs. Suburban Areas
Where you’re installing the sign matters a lot. Urban areas are often crowded with buildings, trees, and other poles. In these tight spaces, side mount brackets are usually the better option. They don’t take up much room and keep the sign at eye level, which is perfect for pedestrians and slower-moving traffic.
Suburban areas, on the other hand, tend to have more open space. Here, top mount brackets shine. They lift the sign higher, making it easier to spot from a distance. This is especially helpful on wider roads or at intersections where visibility is key.
Tip: If you’re working in a busy city, go for side mount brackets. For open suburban roads, top mount brackets are the way to go.
Wind Exposure and Weather Conditions
Weather plays a big role in how well your sign stays put. If you’re in a windy area, like near the coast or in open plains, top mount brackets are your best bet. They’re designed to handle strong gusts and keep the sign steady. Pair them with steel brackets for extra durability.
In calmer areas, side mount brackets work just fine. They’re sturdy enough for everyday conditions and are easier to install. If you’re in a place with lots of rain or humidity, aluminum brackets are a smart choice. They resist rust and last longer in wet weather.
Pro Tip: Always consider the local weather before choosing your bracket. It’ll save you time and money in the long run.
Pole Type and Available Height
Not all poles are the same, and that’s something you can’t ignore. Poles come in different shapes—round, square, or U-channel. Each type needs a specific bracket for a snug fit. For example, U-channel poles work well with both top and side mount brackets, but you’ll need to check the compatibility first.
Height is another factor. If the pole is tall and clear at the top, a top mount bracket is a great choice. It raises the sign for better visibility. But if the pole already has other fixtures, like lights or cameras, a side mount bracket might be your only option.
Note: Measure the pole’s height and check for obstructions before deciding on a bracket.
Compliance with Local Regulations
Following local rules for street signs is very important. Each city or town has its own guidelines for sign placement. Ignoring these rules can lead to fines or safety problems. Let’s look at how to stay on track.
For example, the FHWA’s Manual on Uniform Traffic Control Devices (MUTCD) provides the foundation for traffic sign placement and bracket usage across the U.S.
Why Compliance Matters
Rules exist to keep roads safe and organized. Imagine driving where signs are all different or placed randomly. It would be confusing and unsafe. Local rules set standards for sign height, placement, and visibility.
By following these rules, you help make roads safer for everyone. Signs that meet guidelines are easier to see and read. This reduces accidents and helps people find their way.
Tip: Check your city’s rules before putting up any sign.
What to Look For in Local Guidelines
Each area has its own rules, but here are common ones:
- Height Requirements: Signs must be high enough for drivers and walkers to see.
- Distance from the Road: Signs should be far enough from the road to avoid blocking traffic.
- Blade Type and Bracket Compatibility: Some places require specific blades or brackets, like extruded blades for certain spots.
- Material Standards: Rules may say to use aluminum or steel brackets based on weather or traffic.
Pro Tip: Make a checklist of these rules before starting your project.
How to Stay Compliant
Staying compliant is simple if you follow these steps:
- Research Local Rules: Visit your city’s website to find sign guidelines.
- Consult Experts: Ask local officials or installers if you’re unsure about the rules.
- Choose the Right Bracket: Pick a bracket that meets local standards, like top mounts for dual-direction signs.
- Double-Check Before Installation: Review the rules again before installing to avoid mistakes.
Note: Some cities require permits for sign installation. Don’t skip this step!
The Consequences of Non-Compliance
Not following the rules can cause big problems. You might get fined or have to redo the work, which costs time and money. Worse, a non-compliant sign could cause accidents, putting people in danger.
By following the rules, you help create safer roads and avoid trouble.
Reminder: Following the rules isn’t just about avoiding fines. It’s about keeping everyone safe and making roads easier to navigate.
Deciding on top or side mount brackets depends on your needs. Top mounts are great for open areas and two-way signs. Side mounts work well in small spaces or for one-way signs. Consider your location, sign type, and budget before choosing.
Want to explore more bracket types and their ideal uses? Read our blog: Street Name Sign Brackets: Top Types and Best Uses for expert insights and practical tips.
FAQ
What’s the difference between flat and extruded sign blades?
Flat blades are thin and light, great for side mount brackets. Extruded blades are thicker and stronger, made for top mount brackets. Knowing your blade type helps you choose the right bracket for a secure hold.
Can I use side mount brackets for dual-direction signs?
Side mount brackets are best for single-direction signs. For dual-direction signs, top mount brackets work better. They let you attach two signs back-to-back for visibility on both sides.
Which material is better for coastal areas?
Aluminum brackets are great for coastal areas. They don’t rust and resist salty air. Steel brackets are strong but need a coating to stop rust in humid places.
Are top mount brackets harder to install?
Top mount brackets take more effort since they go on top. You might need a ladder or special tools. Side mount brackets are easier and faster, especially for multiple signs.
How do I know if my sign setup follows local rules?
Check your city’s website for sign rules. Look for details on height, placement, and materials. If unsure, ask local officials or experts to avoid fines and stay compliant.
Tip: Always check local rules before starting to save time and money.
